
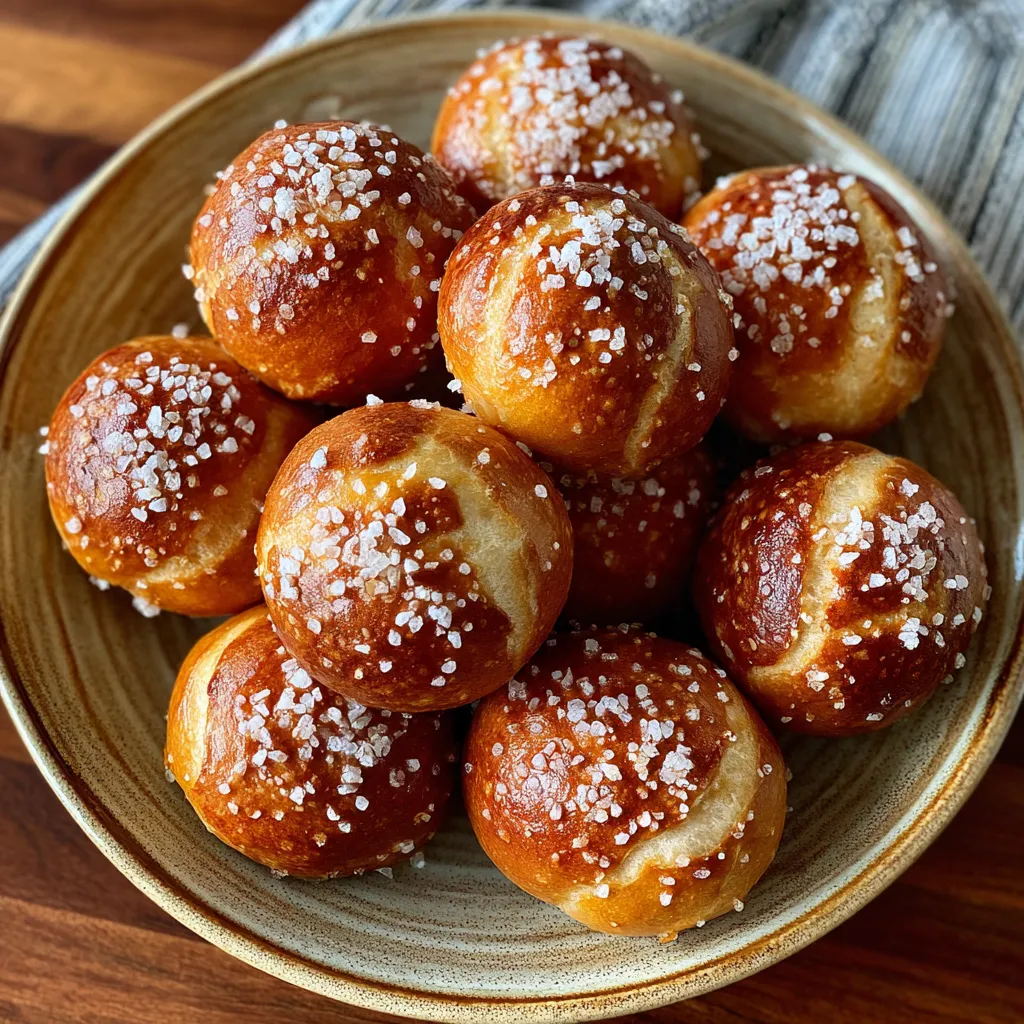
Buttery Soft Pretzel Bites are your ticket to snack-time bliss—little golden, buttery nuggets of tender dough that soak up a baking soda bath for that signature crust and sprinkle on coarse salt for a perfect salty finish. Whether you’re dipping them in mustard or gobbling them plain, each fluffy bite offers a tender center and crisp exterior that’ll have you reaching for “just one more.” Give these irresistible pretzel bites a try, and turn your kitchen into a cozy bakery in no time!
Key Ingredients
Before we get started, let’s meet the stars of this recipe—each one plays a vital role in crafting those dreamy, soft pretzel bites.
- 1 1/2 cups warm water: Activates the yeast and forms the base of your dough.
- 2 1/4 tsp active dry yeast: The leavening agent that makes the dough rise and become airy.
- 1 tbsp granulated sugar: Feeds the yeast for a perfect, frothy proofing stage.
- 1 tsp salt: Enhances flavor and strengthens the gluten structure.
- 4 cups all-purpose flour: Provides structure and that classic tender crumb.
- 8 cups water: Used for the baking soda bath to develop color and chew.
- 1/2 cup baking soda: Raises the surface pH during boiling for a golden crust.
- 4 tbsp unsalted butter, melted: Brushed on for a rich, shiny finish.
- 1 tbsp coarse salt: Sprinkled on top for that signature salty crunch.
How To Make Buttery Soft Pretzel Bites
Let’s roll up our sleeves and transform simple pantry staples into irresistible pretzel bites. You’ll mix and knead a soft dough, let it rise to pillowy perfection, boil it in a baking soda bath for that classic texture, then bake until golden. Finally, a brush of melted butter and coarse salt send these nibbles over the top.
1. In a large bowl, combine warm water, yeast, and sugar; let sit for 5 minutes until frothy. This confirms your yeast is active and ready to leaven the dough.
2. Add salt and flour to the yeast mixture and stir until a dough forms, then knead on a lightly floured surface for 5 minutes until smooth and elastic.
3. Place the dough in a lightly oiled bowl, cover with a clean towel, and let rise in a warm place for 1 hour or until doubled in size.
4. Preheat the oven to 425°F and line a baking sheet with parchment paper to prevent sticking.
5. Punch down the dough, divide into 8 portions, roll each into a long rope, and cut each rope into 1-inch pieces for perfectly bite-sized nuggets.
6. In a large pot, bring 8 cups water and baking soda to a gentle boil; working in batches, drop pretzel bites into the water for 30 seconds, then remove with a slotted spoon.
7. Arrange boiled bites on the prepared baking sheet, brush with melted butter, and sprinkle with coarse salt for that golden shine and savory crunch.
8. Bake for 12 to 15 minutes until golden brown, then brush with any remaining butter and serve warm for maximum indulgence.
Serving Suggestions
These pretzel bites shine on their own, but pairing them thoughtfully can elevate your snack game. From tangy dips to sweet twists, here are a few ideas to make your platter a true crowd-pleaser.
- Classic Mustard Dip: Combine yellow or spicy brown mustard with a touch of honey for a tangy, sweet balance.
- Warm Cheese Sauce: Melt cheddar with a splash of milk and a pinch of paprika for a gooey dunk.
- Garlic Herb Butter: Brush bites with garlic-infused melted butter and sprinkle with chopped parsley for a savory treat.
- Cinnamon Sugar Twist: Toss warm bites in a blend of cinnamon and sugar for a sweet dessert version.
Tips For Perfect Buttery Soft Pretzel Bites
Nailing these pretzel bites is all about attention to detail, from proofing the yeast to achieving that golden crust. Keep your kitchen relaxed and enjoy the process—pretzels are meant to be fun! Always work with gently warmed water, give your dough room to breathe during its rise, and don’t rush the soda bath step. With these friendly pointers, you’ll be turning out bakery-style bites any time you crave a snack.
- For extra flavor, rub pretzel bites with garlic butter after baking.
- Ensure the water is at 110°F to properly activate the yeast.
- Boiling in baking soda water creates the classic pretzel crust and color.
- Store cooled bites in an airtight container at room temperature for up to 2 days.
How To Store It
Want to keep your pretzel bites at their best? Proper storage ensures they stay soft inside and crisp on the outside. Whether you’re saving leftovers for tomorrow or planning ahead, these methods will maintain that fresh-baked taste.
- Room Temperature: Once completely cooled, place bites in an airtight container. They’ll stay soft and flavorful for up to 2 days.
- Refrigeration: Store in a sealed bag for up to 4 days. Reheat in a 350°F oven for 5 minutes to refresh the crust.
- Freezing: Flash-freeze bites on a tray, then transfer to a freezer bag. Keep for up to 1 month and bake from frozen at 375°F for 10 minutes.
- Reheating: Warm in a microwave-safe bowl covered with a damp paper towel for 20 seconds, then brush with butter for fresh taste.
Frequently Asked Questions
Curious minds always have questions—here are quick answers to the most common pretzel bite queries!
- How do I know if the yeast is properly activated?
After combining the warm water (around 110°F), yeast, and sugar, the mixture should become frothy and bubbly within 5 minutes. This indicates the yeast is alive and ready to leaven the dough. If it remains flat, discard and start with fresh yeast and ensure the water isn’t too hot or too cold.
- What should I do if the dough is too sticky or too dry?
If the dough sticks excessively to your hands or work surface, lightly dust it with additional flour and knead until it becomes smooth and elastic. Conversely, if the dough feels stiff or refuses to come together, add water a teaspoon at a time until it forms a cohesive ball.
- Why is the baking soda bath necessary, and what happens if I skip it?
Boiling the pretzel bites in a baking soda solution raises the surface pH, promoting the Maillard reaction for that signature brown crust and slight chewiness. Skipping this step will yield pale, softer bites lacking the classic pretzel flavor and texture.
- Can I prepare the dough in advance and refrigerate it?
Yes. After the initial knead and before the first rise, place the dough in an oiled bowl, cover tightly, and refrigerate for up to 24 hours. When ready, bring it to room temperature, let it finish rising until doubled (about 1 hour), then shape and proceed with the recipe.
- How should I store leftover pretzel bites, and how long will they stay fresh?
Allow the bites to cool completely, then store them in an airtight container at room temperature. They’ll stay soft and flavorful for up to 2 days. To refresh, reheat in a 350°F oven for 5 minutes or microwave briefly, then brush with melted butter.
- What variations can I try for extra flavor?
After baking, brush the warm bites with garlic-infused butter or sprinkle with herbs like rosemary or thyme for a savory twist. You can also roll them in cinnamon sugar immediately after baking for a sweet variation; just skip the coarse salt.
- How do I ensure even browning during baking?
Arrange the pretzel bites on the parchment-lined baking sheet with equal spacing to allow hot air circulation. Brush each piece generously with melted butter before baking, then rotate the sheet halfway through the 12–15 minute bake time to promote uniform color and crispiness.
What Makes This Special
What really sets these Buttery Soft Pretzel Bites apart is the combination of a baking soda bath, buttery finish, and that perfect sprinkle of coarse salt—creating a harmony of textures and flavors in every bite. They’re fun to make, and even more fun to devour, so go ahead and print this article or save it for later. I’d love to hear how yours turn out or help if you hit a snag, so drop a comment or question below. Happy baking!
Print
Buttery Soft Pretzel Bites
- Prep Time: 25 mins
- Cook Time: 21 mins
- Total Time: 46 minutes
- Yield: 8 servings
- Category: Appetizers
Description
Fluffy, golden bites simmered in baking soda water for a signature crust, then baked until crisp and brushed with melted butter, each nugget offers a tender center and a salty finish.
Ingredients
- 1 1/2 cups warm water
- 2 1/4 tsp active dry yeast
- 1 tbsp granulated sugar
- 1 tsp salt
- 4 cups all-purpose flour
- 8 cups water
- 1/2 cup baking soda
- 4 tbsp unsalted butter melted
- 1 tbsp coarse salt
Instructions
- In a large bowl, combine warm water, yeast, and sugar; let sit for 5 minutes until frothy.
- Add salt and flour to the yeast mixture and stir until a dough forms, then knead on a lightly floured surface for 5 minutes until smooth.
- Place the dough in a lightly oiled bowl, cover with a clean towel, and let rise in a warm place for 1 hour or until doubled in size.
- Preheat the oven to 425°F and line a baking sheet with parchment paper.
- Punch down the dough, divide into 8 portions, roll each into a long rope, and cut each rope into 1-inch pieces.
- In a large pot, bring 8 cups water and baking soda to a gentle boil; working in batches, drop pretzel bites into the water for 30 seconds, then remove with a slotted spoon.
- Arrange boiled bites on the prepared baking sheet, brush with melted butter, and sprinkle with coarse salt.
- Bake for 12 to 15 minutes until golden brown, then brush with any remaining butter and serve warm.
Notes
- For extra flavor, rub pretzel bites with garlic butter after baking.
- Ensure the water is at 110°F to properly activate the yeast.
- Boiling in baking soda water creates the classic pretzel crust and color.
- Store cooled bites in an airtight container at room temperature for up to 2 days.