
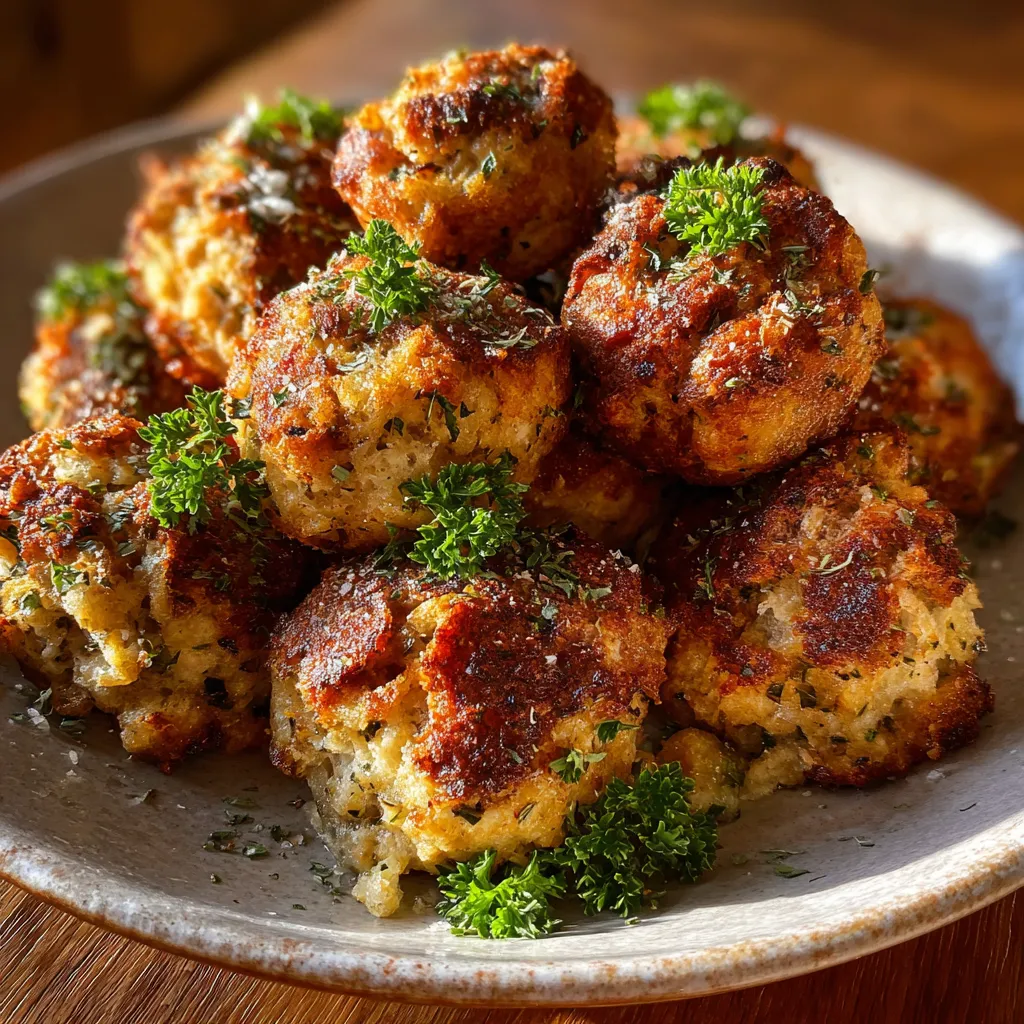
Savory Crispy Baked Stuffing Balls are bite-sized golden orbs bursting with herby stuffing goodness—crispy on the outside, tender and flavorful within! These little marvels crunch through a buttery, herb-studded crust into a soft center infused with garlic, thyme, and a blend of savory spices. Perfectly crisped in the oven, they make any gathering feel extra special. Ready to roll up your sleeves and dive into the fun? Let’s get cooking!
Key Ingredients
Gather these simple, flavorful components to create your perfect stuffing balls:
- 8 cups cubed day-old bread: The base of the mixture, its drier texture soaks up flavors without turning mushy.
- 3 tablespoons butter: Coats the aromatics for a rich, savory taste and helps crisp the exterior.
- 1 medium onion, diced: Adds sweetness and depth to the filling.
- 2 stalks celery, diced: Provides a subtle crunch and savory aroma.
- 2 cloves garlic, minced: Infuses the mixture with a punch of aromatic flavor.
- 2 tablespoons fresh parsley, chopped: Brings fresh herbal brightness to every bite.
- 1 teaspoon dried sage: Offers an earthy warmth that’s classic to stuffing.
- 1 teaspoon dried thyme: Lends a subtle floral note to balance the herbs.
- 1 teaspoon poultry seasoning: Delivers a balanced blend of spices for that signature stuffing taste.
- 2 large eggs, lightly beaten: Binds all the ingredients and helps the balls hold their shape.
- 1 cup chicken broth: Moistens and seasons the bread for a tender interior.
- 1 tablespoon olive oil: Brushed on top to promote an extra-crispy crust.
- 1 teaspoon salt: Enhances all the flavors in the mix.
- 1/2 teaspoon black pepper: Adds a gentle kick and depth.
How To Make Savory Crispy Baked Stuffing Balls
Creating these delightful stuffing balls is a breeze when you follow a few clear steps. You’ll sauté aromatic vegetables with herbs, combine them with cubed bread, bind everything together with eggs and broth, then shape and bake until golden and crispy. Each stage builds layers of flavor and texture, so take your time with the aromatics and don’t skip the olive oil brush for that perfect crunch.
1. Preheat your oven to 375°F and line a baking sheet with parchment paper to prevent sticking and ensure even browning.
2. Melt butter in a skillet over medium heat, then add the diced onion, celery, and minced garlic. Sauté until the vegetables are softened and fragrant, about 5 minutes.
3. Stir in fresh parsley, dried sage, thyme, and poultry seasoning; cook for an additional minute to toast the herbs and release their aromas.
4. In a large bowl, combine the cubed bread, sautéed vegetables, salt, and black pepper, tossing gently to distribute everything evenly.
5. Pour the lightly beaten eggs and chicken broth over the bread mixture, then toss with a spatula or your hands until the bread is evenly moistened.
6. Shape the mixture into 1½-inch balls, pressing gently so they hold together, and place them on the prepared baking sheet about 1 inch apart.
7. Brush each ball lightly with olive oil to encourage a golden, crispy crust during baking.
8. Bake for 20 to 25 minutes, turning the balls halfway through, until they are golden brown and crisp on all sides.
9. Remove from the oven and let the stuffing balls rest for 5 minutes to firm up before serving.
Serving Suggestions
Whether you’re hosting a holiday feast or a simple get-together, these stuffing balls shine alongside all kinds of dishes. Their crisp exteriors and tender, herb-infused centers make them versatile and crowd-pleasing. Here are four creative ways to serve them:
- Holiday Spread: Arrange the stuffing balls on a festive platter alongside slices of roasted turkey and cranberry sauce for a classic holiday buffet.
- Appetizer Platter: Serve warm with creamy dipping sauces like garlic aioli or cranberry chutney for a crowd-pleasing starter.
- Soup Topper: Float a few crispy balls in a bowl of butternut squash or chicken soup to add texture and herby flavor.
- Side Dish Upgrade: Pair them with roasted vegetables and a drizzle of gravy for a comforting weeknight dinner.
Tips For Perfect Savory Crispy Baked Stuffing Balls
Getting the ideal balance of crispiness and tenderness is all about the details. Keep these friendly pointers in mind to elevate your stuffing balls every time:
- Use day-old bread for a firmer texture that holds its shape.
- Customize herbs to taste or add a pinch of rosemary for a fragrant twist.
- For a vegetarian version, use vegetable broth instead of chicken broth.
- Stuffing balls can be made ahead and frozen before baking for easy meal prep.
How To Store It
Proper storage ensures your stuffing balls stay fresh, flavorful, and ready to reheat at a moment’s notice. Follow these methods to preserve their texture and taste:
- Refrigeration: Once cooled completely, place in an airtight container and store in the fridge for up to 3 days.
- Freezing (Unbaked): Shape balls and freeze them on a lined sheet for 1–2 hours until firm, then transfer to a freezer bag for up to 1 month.
- Freezing (Baked): After baking and cooling, freeze in a single layer before packing in a sealed container; thaw in the fridge before reheating.
- Reheating: Arrange stored balls on a baking sheet and warm at 350°F for 8–10 minutes until heated through and crisp, or use an air fryer at 350°F for 5 minutes.
Frequently Asked Questions
Here are some quick answers to the most common questions about these stuffing balls:
- Q: How long does it take to prepare and bake the stuffing balls?
A: The prep time is about 10 minutes to chop and sauté, plus 5 minutes mixing and shaping, and the bake time is 20–25 minutes. After baking, allow 5 minutes resting time. In total you should plan on about 40–45 minutes from start to finish.
- Q: Why is day-old bread recommended and can I use fresh bread instead?
A: Day-old bread is drier, which helps it absorb liquids without becoming mushy and ensures the balls hold their shape during baking. If you only have fresh bread, you can lightly toast it in a 350°F oven for 10–15 minutes to remove excess moisture before cubing.
- Q: What can I do if my mixture seems too dry or too wet when shaping the balls?
A: If it’s too dry to form balls, add a splash of extra chicken broth (or vegetable broth for a vegetarian version), one tablespoon at a time until it holds. If it’s too wet and sticks excessively, stir in a few more bread cubes or let it rest for 5 minutes to allow the liquid to redistribute before reshaping.
- Q: Can I make these stuffing balls ahead of time or freeze them?
A: Yes. Shape the mixture into balls and place them on a lined baking sheet. Freeze them for about 1–2 hours until firm, then transfer to a sealed container or freezer bag for up to 1 month. Bake directly from frozen, adding an extra 5 minutes to the baking time for best results.
- Q: How do I achieve an extra-crispy exterior on the stuffing balls?
A: Brushing each ball with olive oil before baking helps promote browning. Bake on a parchment-lined sheet at 375°F, turning halfway through. For a crunchier finish, switch to a convection setting if available or broil for the last 1–2 minutes while watching closely to avoid burning.
- Q: What variations can I make to the herb and seasoning blend?
A: You can customize by adding ½ teaspoon of dried rosemary or replacing poultry seasoning with a blend of smoked paprika and ground sage. Fresh chopped thyme or chives can also boost flavor; just keep the total herb volume balanced around 3 tablespoons.
- Q: How do I store and reheat leftovers for best quality?
A: Cool any leftover balls completely before storing in an airtight container in the refrigerator for up to 3 days. To reheat, arrange them on a baking sheet and bake at 350°F for 8–10 minutes until warmed through and crisp. You can also reheat in an air fryer at 350°F for 5 minutes.
What Makes This Special
These Savory Crispy Baked Stuffing Balls capture all the comforting flavors of classic stuffing in a playful, bite-sized form. Their golden crust gives way to a tender, herb-infused center that’s perfect for holidays, weeknight dinners, or casual snacking. With simple ingredients and straightforward steps, this recipe delivers big on taste and fun factor. Don’t forget to print this article and save it for later—you’ll want these golden morsels on repeat! If you give them a try, drop a comment or ask any questions below; I’m here to help.
Print
Savory Crispy Baked Stuffing Balls
- Prep Time: 15 mins
- Cook Time: 25 mins
- Total Time: 40 minutes
- Yield: 8 servings
- Category: Side Dishes
Description
Golden, herb-studded balls crunch with a buttery crust, revealing a soft, savory center infused with garlic and thyme. Perfectly crisped in the oven to warm up any gathering.
Ingredients
- 8 cups cubed day-old bread
- 3 tablespoons butter
- 1 medium onion diced
- 2 stalks celery diced
- 2 cloves garlic minced
- 2 tablespoons fresh parsley chopped
- 1 teaspoon dried sage
- 1 teaspoon dried thyme
- 1 teaspoon poultry seasoning
- 2 large eggs lightly beaten
- 1 cup chicken broth
- 1 tablespoon olive oil
- 1 teaspoon salt
- 1/2 teaspoon black pepper
Instructions
- Preheat oven to 375°F and line a baking sheet with parchment paper.
- Melt butter in a skillet over medium heat and sauté onion, celery, and garlic until softened.
- Stir in parsley, sage, thyme, and poultry seasoning and cook for 1 minute.
- In a large bowl combine bread cubes, sautéed vegetables, salt, and pepper.
- Pour beaten eggs and chicken broth over the bread mixture and toss until evenly moistened.
- Shape the mixture into 1½-inch balls and place them on the prepared baking sheet.
- Brush each ball lightly with olive oil for extra crispiness.
- Bake for 20 to 25 minutes, turning halfway, until golden and crispy.
- Remove from oven and let rest for 5 minutes before serving.
Notes
- Use day-old bread for a firmer texture that holds its shape.
- Customize herbs to taste or add a pinch of rosemary.
- For a vegetarian version, use vegetable broth instead of chicken broth.
- Stuffing balls can be made ahead and frozen before baking.